New Microsoft Lumia 638

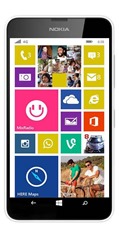
Microsoft has launched the cheapest 4G smart phone device . It will be the most affordable Lumia 638 with Windows Phone 8.1

It comes with a 4.5-inch FWVGA IPS ClearBlack LCD capacitive touchscreen, 5MP primary camera, 1.2GHz Snapdragon 400 quad core processor, 1GB RAM, 8GB internal memory expandable up to 128GB and more.

Below are the Technical Specs of the Lumia 638

Specs:Lumia 638

Weight: 136g

Dimensions : 13 x 0.9 x 6.7 cm

Operating System : Windows Phone 8.1

Display : 4.5-inch FWVGA IPS ClearBlack LCD capacitive touchscreen with 480×854 pixels resolution, TrueColor(24-bit/16M)

Connection Type : 3G, LTE/4G, GPRS, WiFi (WLAN IEEE 802.11 b/g/n, Wi-Fi Direct), GSM (850/900/1800/1900 MHz), WCDMA (2100/1900/850/900 MHz)

Primary Camera : 5MP

Video Resolution : 720p (1280 x 720)

Battery: 1830mAH, (Talk time GSM: Up to 19.5 hours, 3G: Up to 20.1 hours)

The only setback for the device is that it lacks a front camera and Flash for the Primary camera.

Warranty: The device comes with 1 year manufacturer warranty and 6 months manufacturer warranty for in-box accessories including batteries from the date of purchase

Offer : Airtel 4G Postpaid users from Bengaluru can enjoy the Bundle offer of 5GB 4G data per month for 2 Months.

Lumia 638 (Black) is now available Exclusively on Amazon.in
PayUMoney – An Easy Payment Option

Looking for a option to get Paid online?

PayUMoney Merchant services offers products like Sending Email Invoices, SMS Invoice, PayUMoney Button, Web Fronts, Web Stores, Events etc.

SignUp with PayUMoney and get your Bank details verified. Do not worry, the PayUMoney Customer service will provide all the necessary support to get your bank details verified.

We can easily create a PayUMoney Button with a fixed price, so that our customer/buyer can pay the exact amount by simply clicking on the button. Yeah, this will be the fastest method to collect payment online. Similarly Email/SMS invoices are also created and sent to our customer. The Responsive design enables the customer to pay on mobile devices also.

If you need to create an Ecommerce Store, here is a option to start your own store. Display your products and set prices for those products. PayUMoney Web Store will take care of the cart and checkout process.

It also provides us APIs for various platforms to integrate PayUMoney directly with our website.

Now we have an offer till December 31, 2014. The transaction charges are reduced from 2.9% to 2%. Enjoy the benefit.

All the above features are for the Sellers/merchants, So what about the Buyers? How are they benefited?

The Buyers can save their Credit/Debit Card in the PayUMoney Wallet for future use. So, when they return to PayUMoney for another payment, they need not enter the Card details, they just have to enter the Credentials to Pay. Isn’t it simple and awesome.

If you are not satisfied with the product/ service delivered by the Seller/Merchant, You can raise Dispute via PayUMoney Buyer Protection scheme. so that you will get the right kind of product or a refund.

You can also receive Cash Back offers on selected merchants.

Sign Up Immediately and Enjoy the benefits of the Festival season.

log4net: logger Configuration – Step by step

log4net is part of the Apache Logging Services project at the Apache Software Foundation. The Logging Services project is to provide logging services for purposes of application debugging and auditing. Log4net is a port of the excellent Apache log4j™ framework to the Microsoft® .NET runtime. log4net helps us to log the output to Multiple logging targets 

In this post I will use the RollingFileAppender (which will write the log to an external file), on a MVC web application (C#).

Step 1. Download the log4net binary file from http://logging.apache.org/log4net/download_log4net.cgi

Step 2. Add Reference to the log4net.dll in the Project.

Step 3. Add the following in Global.asax.cs

   1: using log4net;

   2: using log4net.Config;

   3:  

   4: ..

   5: ..

   6:  

   7: log4net.Config.XmlConfigurator.Configure(new FileInfo(Server.MapPath("~/log4net.config")));

   8: ..

   9: ..

log4net.config will be the xml file, which will have the configuration of the logger.

Step 4. Add the following line to the AssemblyInfo.cs to keep watch of the log4net.config file for changes.

   1: [assembly: log4net.Config.XmlConfigurator(Watch = true)]

Step 5. Add the following line at the starting of every class to initialize the logger object

   1: private static readonly log4net.ILog log = log4net.LogManager.GetLogger("MyLogger");

Step 6. Create a xml file and name it as log4net.config and paste the following code

   1: <?xml version="1.0"?>

   2: <configuration>

   3:   <configSections>

   4:     <section name="log4net" type="log4net.Config.Log4NetConfigurationSectionHandler, log4net"/>

   5:   </configSections>

   6:   

   7:   <log4net>

   8:     

   9:     <appender name="RollingFileAppender" type="log4net.Appender.RollingFileAppender">

  10:       <file value="mylog.log" />

  11:       <appendToFile value="true" />

  12:       <rollingStyle value="Size" />

  13:       <maxSizeRollBackups value="5" />

  14:       <maximumFileSize value="10MB" />

  15:       <staticLogFileName value="true" />

  16:       <layout type="log4net.Layout.PatternLayout">

  17:         <conversionPattern value="%date [%thread] %level %logger - %message%newline" />

  18:       </layout>

  19:  

  20:       <filter type="log4net.Filter.LevelRangeFilter">

  21:         <levelMin value="INFO" />

  22:         <levelMax value="FATAL" />

  23:       </filter>

  24:     </appender>

  25:     <logger name="MyLogger">

  26:       <level value="ALL" />

  27:       <maximumfilesize value="256KB" />

  28:       <appender-ref ref="RollingFileAppender" />

  29:     </logger>

  30:     

  31:     

  32:     <root>

  33:       <level value="ALL" />

  34:       <appender-ref ref="RollingFileAppender" />

  35:     </root>

  36:   </log4net>

  37: </configuration>

Step 7. Now write the log message as required. Loggers may be assigned levels. The following levels are defined in order of increasing priority:

    • ALL
    • DEBUG
    • INFO
    • WARN
    • ERROR
    • FATAL
    • OFF
   1: log.Warn(“My Log Message”);

The above line will write the log only if a warning occurs.

Save and Run the project mylog.log will be created in the Project’s root folder.

This is the basic level of configuring the logger. Loggers can be configured for each and every class/ namespace/ method, etc.. Every class may have a separate log file, so that monitoring the application will be easy.

Visual Studio 2013 Update 1

Microsoft has released Visual Studio 2013 Update 1 on January 20, 2014.  The Visual Studio update is an update that installs on top of existing client products (such as Professional, Premium, Ultimate, or Express for Windows) that are already installed on the computer.

The Release Management update is a full layout that includes the latest feature additions and bug fixes for “Release Management for Visual Studio 2013.” Before you try to apply the Release Management update, make sure that you have a full backup of your current databases.

Some of the new features that may be of interest to developers include:

  • A new version of Microsoft ASP.NET Web Frameworks and Tools (version 5.0.11213.0). It adds editing support for ASP.NET MVC 5.1 on top of all existing functionality from the Web Framework and Tools 5.0 release.
  • A new version of Nuget, 2.7.2. It fixes a bug which caused certain packages to fail when running package restore, update or uninstall.
  • Another Web tool, SignalR 2.0.1, which includes new item templates.
  • IntelliTrace Viewer users should note that it’s been updated to support Internet Explorer 9.

Supported operating systems

For more information about supported operating systems, go to the following Microsoft website: Platform compatibility and system requirements for Visual Studio 2013

Supported architectures

  • 32-bit (x86)
  • 64-bit (x64) (WOW)

Hardware requirements

  • 1.6 gigahertz (GHz) or faster processor
  • 1 gigabyte (GB) of RAM (1.5 GB if you are running in a virtual machine)
  • 1 GB of available hard disk space
  • 5,400 RPM hard disk drive
  • DirectX 9-capable video card that is running at 1024 × 768 or higher resolution

Software requirements

To apply this update, you must have one of the supported Visual Studio 2013 programs that are listed below

  • Release Management Client for Visual Studio 2013
  • Release Management for Visual Studio 2013
  • Release Management Server for Team Foundation Server 2013
  • Microsoft Visual Studio Ultimate 2013
  • Microsoft Visual Studio Professional 2013
  • Microsoft Visual Studio Premium 2013
  • Microsoft Visual Studio Express 2013 for Web
  • Microsoft Visual Studio Express 2013 for Windows
  • Microsoft Visual Studio Express 2013 for Windows Desktop

Download Update from http://www.microsoft.com/en-us/download/details.aspx?id=41650

Getting Started with Windows Store Apps Development

Though we have seen many of the Getting started blogs, this is my first of this kind. So, let’s see how to get started to develop a Windows 8 Store App.

All Details about the Developer tools, related SDKs, System Requirements, Documentations, Sample Codes are available in the MSDN library. Note that Windows Store Apps can be developed only in Windows8 Operating System.

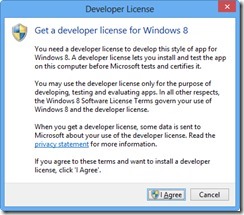
Once Visual Studio is installed you can start developing Apps in C#, VB and JavaScript. So, this is an added advantage for the web developers. Creating an app with HTML,JavaScript,CSS is like developing a web app. Choose any of the Platform and choose Blank App Template, our Solution will be created. To develop apps, you will be prompted for Developer License. You can register with any Microsoft Account/ Live ID/ Hotmail ID to get a 90 days Developer License.

windows 8 developer license

Now, Start writing your code, develop you Windows Store App Before you submit your App you have to do the following:Create App Packages

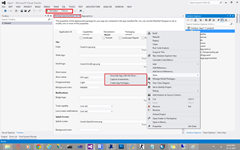
  • Set the LOGOs, Capabilities, Declarations in the Package.appmanifest.
  • Capture Screen Shots by running the App in Release mode in the Simuator.
  • Create App Packages.
  • Associate your App with the Store.
  • Run the App Certification Kit. (Submit the App only if the result is PASSED)


When it is ready to be Published, you must have a Windows Store Developer Account. Sign up to Upload the App package. the Dev Centre will take you through the Submission process. Once your Submission is completed, your App will be tested and Published to the Windows Store.

Thanks For Reading the post.

Subscribe the Blog, Follow on Twitter, FaceBook, Tumblr.

Technology Blog